Hiển thị các bài đăng có nhãn Widget. Hiển thị tất cả bài đăng

Thứ Năm, 3 tháng 11, 2016

Reaction Buttons for Blogger using Vicomi

Reaction Buttons for Blogger - here is another big and very useful blogger widgets. You can show reaction buttons on your blogspot blog. Reaction is a smart way for your visitors to leave feedback without leaving any comments. Here is very simple way to add recation buttons for blogspot blogger using vicomi.com.

Reaction Buttons for Blogger using Vicomi


You can discover lots of awesome blogger widgets by msdesignbd. Now lests starting the tutorial.
Step1: Go to vicomi.com
Step2: Now signup with your Blog title, e-mail and your website.
Reaction Buttons for Blogger using Vicomi

Step3: Now choose your emotion design and click Done.
Step4: Now copy the code.
Reaction Buttons for Blogger using Vicomi

Step5: Now go to Edit HTML and find <data:post.body/>
Step6: Past copied code right after <data:post.body/>

Thứ Bảy, 6 tháng 8, 2016

Bottom Floating Facebook Like Box Widget for Blogger

Bottom Floating Facebook Like Box Widget for Blogger - Hello blogger buzz, after long time, msdesign gonna sharing another great blogger widget. This is very unique and helpful widget for all blogger. Sometimes we have need to engage with our audience. Facebook pan page is easiest way to keep your audience in your hand. Then you have to need increase your fan page like. By using this awesome bottom floating facebook like box for blogger you can easily increase your facebook like with your targeted audience.

Awesome floating facebook like box for blogger

Bottom Floating Facebook Like Box for Blogger Blogspot

Before some days, at first i installed this bottom floating like box on my own blog and i get a very positive result. This widget working fine with also smartphone device. You should also try Sidebar Floating Facebook Like Box For Blogger this widget also working fine. I hope this blogger widgets will be helpful for you for increasing your facebook like.


Now lets star the tutorial. Before starting work, please take a backup of your template for safety.
Now go to Template > Edit HTML and past the below CSS before </style>
 #open-fb{background-color: #FFFFFF; border: 4px solid rgb(210, 210, 210); bottom: 0; border-bottom: 0; float:left; height: auto; margin-bottom: 0; margin-right: 5px; position: fixed; right: 0; width: auto; z-index: 10;}
.close-fb{color: #333!important; position: absolute; top: 1px; right: 1px; width: 20px; height: 20px; line-height: 20px; text-align: center; font-size: 11px;}
.slideUp{
animation-name: slideUp;
-webkit-animation-name: slideUp;

animation-duration: 1s;
-webkit-animation-duration: 1s;

animation-timing-function: ease;
-webkit-animation-timing-function: ease;

visibility: visible !important;
}

@keyframes slideUp {
0% {
transform: translateY(100%);
}
50%{
transform: translateY(-8%);
}
65%{
transform: translateY(4%);
}
80%{
transform: translateY(-4%);
}
95%{
transform: translateY(2%);
}
100% {
transform: translateY(0%);
}
}

@-webkit-keyframes slideUp {
0% {
-webkit-transform: translateY(100%);
}
50%{
-webkit-transform: translateY(-8%);
}
65%{
-webkit-transform: translateY(4%);
}
80%{
-webkit-transform: translateY(-4%);
}
95%{
-webkit-transform: translateY(2%);
}
100% {
-webkit-transform: translateY(0%);
}
}

Now past below codes before </body>
 <div class='slideUp' id='open-fb'>
<a class='close-fb' href='#close-fb-like-box' onclick='hide(&apos;open-fb&apos;)' title='Close'><i class='fa fa-times'/></a>
<div class='fb-like-box ' data-header='false' data-height='62' data-href='https://www.facebook.com/msdesign.rtml' data-show-faces='true' data-stream='false' data-width='187'><span style='height: 62px; width: 187px; '><iframe allowTransparency='true' frameborder='0' scrolling='no' src='//www.facebook.com/plugins/likebox.php?href=https%3A%2F%2Fwww.facebook.com%2Fmsdesign.rtml&amp;width=187&amp;height=62&amp;show_faces=false&amp;colorscheme=light&amp;stream=false&amp;border_color&amp;header=true' style='border:none; overflow:hidden; width:187px; height:62px;'/>
</span></div></div>
<script type='text/javascript'>

function show(target) {
document.getElementById(target).style.display = &#39;block&#39;;
}

function hide(target) {
document.getElementById(target).style.display = &#39;none&#39;;
}
</script>

Note: Change /msdesign.rtml with your page user name twice.

Now Save template and view result by refreshing page.


Hope guys you liked this awesome blogger widgets. If yes, then do not forget to share this on you social media and other friends. And if your facing any problems with this bottom floating facebook like box widget for blogger, then inform us on comment section with your problem. Will hard try to resolve your problems. Thanks you.

Thứ Ba, 2 tháng 8, 2016

2 Best Email Subscribe Widget for Blogger

blogger subscribe widget 2 style free

How to add feedburner email subscription widget for blogger. Email subscribe widget is most important part of every blogger. Do you know what is email subscribe widget? Yes! this is collect huge amount traffic for your blog. Today i am share 2 beautiful blogger email subscription widget for your blog. Check this JSC Exam Result 2016 Earlier some days, i shared a another popup subscribe box for blogger and that is Pop up Email Subscribe box for Blogger. But today i am share another 2 creative email subscription widget box for blogger and one subscription widget is with social icons. 

A Feedburner email subscription widget can bring a huge number of visitors on your blog. Visitors are subscribe in your blog by put their email and they always get your new updates on their email. Email subscription form on blogger is a important widget.

Email Subscribe Widgets for Blogger

If you place blogger email subscription widget on sidebar then, it will be better. But popup and below of every post is also good place to add email subscribe box in blogger. Today i am share 2 creative sidebar email subscribe box widget for blogger. 
  1. Dark background with social icons
  2. Colorful widget with name box

How it work?

Everyone know about google's feedburner. In short, google feedburner is most popular RSS web service feed. If anyone subscribe on your blog with their email, then feedburner to deliver your latest posts on all subscribed emails. In this tutorial i shared 2 subscribe box widget for blogger. Using these widget you can also grow up your blog's visitors.

How to registration on feedburner? Go to the following link and registration with your blog address and your email: feedburner.google.com. If ones done, then collect your feedburner username and note it.

Now lets start our tutorial.

1- Dark background with social icons

Its the awesome and cute email newsletter subscribe box widget for blogger that created with pure css with fontawesome icons. By using this email newsletter forms you can also use your social media links like Facebook, twitter, linkedin, google plus, pinterest, vine and instagram social icons. Attractive subscription widget box is better for every blog. Our first widget is more attractive for blogger.


subscribe box widget for blogspot


First you have to need add fontawesome icon and PT Sans google font. If already added then ignore step 1.

Note: If you use our code, then you agree to give proper footer credit.

Step 1: Go to Blogger Dashboard > Template > Edit HTML and past below codes right after <head>
 <link href='https://maxcdn.bootstrapcdn.com/font-awesome/4.4.0/css/font-awesome.min.css' rel='stylesheet' type='text/css'/>
<link href='//fonts.googleapis.com/css?family=PT+Sans:400,700' rel='stylesheet' type='text/css'/>


Step 2: Now need to add CSS Code before </style>
 #subscribebox{background:#576269;padding:20px;font-family:&#39;PT Sans&#39;,sans-serif;}
.widget_follow_subscribe .widget-detail{padding:36px 30px 40px}
#subscribebox p{color:#fff;font-size:15px;text-align:center;font-weight:700}
.follow-subscribe-social{margin:0 0 15px;padding:0 0 14px;border-bottom:#858585 solid 1px}
.follow-subscribe-social ul{list-style:none;margin:0;padding:0;text-align:center}
.follow-subscribe-social ul li{display:inline;margin:0 15px 0 0;border-bottom:none}
.follow-subscribe-social ul li:last-child{margin:0}
.follow-subscribe-social ul li a{font-size:17px;color:#cacaca;-webkit-transition:color .2s ease-in-out;-moz-transition:color .2s ease-in-out;-ms-transition:color .2s ease-in-out;-o-transition:color .2s ease-in-out;transition:color .2s ease-in-out}
.follow-subscribe-social ul li a:hover{color:#fff}
form.subscribe{margin-top:-7px}
form.subscribe input{display:block;width:100%}
.subscribe-email{height:45px;border:none;margin:0 0 10px;font-size:.928571em;background-color:rgba(255,255,255,0.2);text-align:center;color:#fff}
.subscribe-email:focus{outline:0}
form.subscribe .placeholder{color:#cacaca}
form.subscribe input:-ms-input-placeholder{color:#cacaca}
form.subscribe input::-webkit-input-placeholder{color:#cacaca}
form.subscribe input:-moz-placeholder{color:#fafafa}
form.subscribe input::-moz-placeholder{color:#fafafa}
.subscribe-button{height:45px;font-weight:700;font-size:16px;color:#fff;text-transform:uppercase;border:none;background-color:#F35D5C;-webkit-transition:background-color .2s ease-in-out;-moz-transition:background-color .2s ease-in-out;-ms-transition:background-color .2s ease-in-out;-o-transition:background-color .2s ease-in-out;transition:background-color .2s ease-in-out}
.subscribe-button:hover{background-color:#f1d640}
.subscribe-button:focus{outline:0}
.creadit a{color: #A7A6A6; float: right; font-size: 8px;}

Save Template.

Now go to Layout > Add a gadget > HTML/Javascript and past below HTML code and save widget.
 <div id="subscribebox">
<div class="follow-subscribe-social">
<ul>
<li><a href="#" target="_blank"><i class="fa fa-facebook"></i></a></li>
<li><a href="#" target="_blank"><i class="fa fa-twitter"></i></a></li>
<li><a href="#" target="_blank"><i class="fa fa-linkedin"></i></a></li>
<li><a href="#" target="_blank"><i class="fa fa-google"></i></a></li>
<li><a href="#" target="_blank"><i class="fa fa-pinterest-p"></i></a></li>
<li><a href="#" target="_blank"><i class="fa fa-dribbble"></i></a></li>
<li><a href="#" target="_blank"><i class="fa fa-instagram"></i></a></li>
</ul>
</div>
<p>Subscribe to my Newsletter</p>
<form class="subscribe" action='http://feedburner.google.com/fb/a/mailverify?uri=YOUR-USER-NAME' method='post' onsubmit='window.open(&apos;http://feedburner.google.com/fb/a/mailverify?uri=YOUR-USER-NAME, &apos;popupwindow&apos;, &apos;scrollbars=yes,width=550,height=520&apos;);return true' target='popupwindow'>
<input name='uri' type='hidden' value='YOUR-USER-NAME'/>
<input name='loc' type='hidden' value='en_US'/>
<input class="subscribe-email" type='text' name='email' onblur='if (this.value == &quot;&quot;) {this.value = &quot;Your Email&quot;;}' onfocus='if (this.value == &quot;Your Email&quot;) {this.value = &quot;&quot;;}' value='Your Email'/>
<input class="subscribe-button" type="submit" value="Subscribe" />
</form>
</div>
<div class="creadit">
<a href="http://msdesignbd.com" rel="dofollow" target="_blank"> Get This Widget</a></div>

Customization:

  • Change all # tag with your all social media link.
  • Change all YOUR-USER-NAME with your feedburner user name.

2 - Colorful widget with name box

You can use this widget below of every post. This subscribe box widget is created with simple css with colorful background. In this email subscription widget visitors are able write their name. The name box make this widget more professional. In this widget you can change subscribe box heading. Default heading is: "Subscribe for our all latest news and updates". Now lets start this,


blogger feedburner subscribe box widget


Step 1: Firstly need to add CSS code of this widget. So, copy past below css before </style>
 #subscribe-box {background-color:#0CC388;font-family: 'PT Sans', sans-serif;}
#subscribe-box p {font-size:22px;color:#fff;line-height:20px;padding:10px 20px 0 20px;margin:0;}
#subscribe-box .emailfield {padding:0px 20px 10px;}
#subscribe-box .emailfield input {background:#f9f9f9;color:#bbb;padding:10px;margin-top:10px;font-size:13px;width:91%;border:0;transition:all 0.4s ease-in-out;}
#subscribe-box .emailfield input:focus {background:#fff;outline:none;color:#888;}
#subscribe-box .emailfield .submitbutton {background:#444;color:#fff;text-transform:uppercase;font-weight:700;font-size:18px;font-family: 'PT Sans', sans-serif;;border:none;outline:none;width:100%;cursor:pointer;border-radius:3px;transition:all 0.4s ease-in-out;}
#subscribe-box .emailfield .submitbutton:active {outline:none;border:none;background:#fff;color:#e25734;}
#subscribe-box .emailfield .submitbutton:hover{background:#fff;color:#444;}
.creadit a{color: #A7A6A6; float: right; font-size: 8px

Save Template.

Now add a new HTML/Javascript gadget from Layout and past below code.
 <div id="subscribe-box">
<center>
Subscribe for our all latest news and updates</center>
<div class="emailfield">
<form action="http://feedburner.google.com/fb/a/mailverify?uri=USER-NAME" method="post" onsubmit="window.open('http://feedburner.google.com/fb/a/mailverify?uri=USER-NAME, 'popupwindow', 'scrollbars=yes,width=550,height=520');return true" target="popupwindow">
<input name="name" onblur="if (this.value == &quot;&quot;) {this.value = &quot;Your Name&quot;;}" onfocus="if (this.value == &quot;Your Name&quot;) {this.value = &quot;&quot;;}" type="text" value="Your Name" />
<input name="email" onblur="if (this.value == &quot;&quot;) {this.value = &quot;Your Email&quot;;}" onfocus="if (this.value == &quot;Your Email&quot;) {this.value = &quot;&quot;;}" type="text" value="Your Email" />
<input name="uri" type="hidden" value="USER-NAME" />
<input name="loc" type="hidden" value="en_US" />
<input class="submitbutton" type="submit" value="Subscribe Now" />

</form>
</div>
</div>
<div class="creadit">
<a href="http://msdesignbd.com/" rel="dofollow" target="_blank"> Get This Widget</a></div>


Customization:
  • Change all USER-NAME with your feedburner user name. 

Hope this 2 email subscribe box widget is helped you. If you found any problems, then inform me on comment section, i will try to solve your problems. And finally don't forget to share our posts with your friends. Thanks... 

Thứ Năm, 21 tháng 7, 2016

15+ Best Blogger widgets and Plugins 2017

best blogger widgets and gadget install now
15+ Best free Blogger widgets and Plugins 2017 - Welcome to our another blogger tutorial. Blogger's popularity increasing day by day. Blogger is the best and CMS blogging platform you know. It is the most powerful CMS nowadays. Maximum people choice blogger for it's easy customization. People can easily upload custom blogger templates. That's why maximum newbie blogger's first choice is Blogspot platform. In this post i will share 15+ free and best blogger widgets that are mostly needed in every blog.

Best Blogger Widgets 2017

I can hardly says these widgets are best blogger widgets and gadgets 2017. Every bloggers know that, we can't add any widgets or plugins like wordpress. We have to need add any blogger widgets or plugins manually. Some people are always looking for beautiful and essential blogspot widgets for his/her blog. Today gonna to share 15+ hand-picked free and best blogger widgets and i hope that, these blogger widgets are may helpful for you and its absolutely free widgets.

Discover now our 10+ best responsive and SEO optimized free blogger templates.

Floating Facebook Like Box For Blogger

Sidebar Floating Facebook Like Box For Blogger

It's a best blogger widget to promote facebook fan box into your blog. Sidebar Floating Facebook Like Box For Blogger - is a widget for adding a like box on blogger in sidebar. Facebook like box for website or blogspot is a important widget to increase fan page like. You can easily grow up your facebook fan page like using facebook like box. This is the best blogger plugins and widgets to promote facebook like box. Today i am share awesome and beautiful facebook like box for website. This a sidebar floating facebook like box. When visitors mouse hover in facebook icon, then it Floating and open a like box from sidebar. This script i founded around internet. But i customize this script with CSS and get up an awesome look. You can add this code also any wordpress blog.


CSS Social Share Button for Blogger

Flat Social Share Button for Blogger

Flat Social Share Button for Blogger - install this social button widget in your blog. By using this blogger widget you can add share button for blogger posts. It's a best sharing button for blogger. Some users sometimes looking for facebook share button for blogger. But in this widget we bring some more social platform. This is simple social share widget for blogger. Sometimes some users looking for a unique, minimal, flat and simple social share buttons for their blog. In this blogger tutorial i will share a awesome and most popular CSS social share button for blogspot blog. A social share buttons is a important part in every blog. Its the greatest way to increase every blog traffic. When users are found your blog post in helpful then they will to share your posts on social media. In your blog's has a attractive social share icons, then they easily share your content in their account.

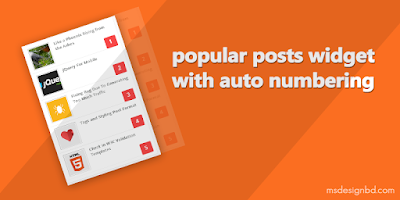
Popular Posts widget with Thumbnail and Auto Numbering

Blogger Popular Posts widget with Thumbnail and Auto Numbering

This is another best and useful gadgets for blogger. Some users want to customize popular posts widget blogger. I can hardly say, it is the best popular posts widget blogger and perfect for every blog. Blogger Popular Posts widget with Thumbnail and Auto Numbering - in this tutorial i will share how add a popular posts widget in your blog with Thumbnail and auto numbering. Blogger popular posts widget is a customize able widget with CSS. Thumbnail popular post is most popular nowadays. That's why you should use this blogger popular posts widget with thumbnails for your blog.


Email Subscription form Widget for Blogger

subscribe box widget for blogspot

Subscription box widget for blogger is a another best and essential blogger widgets. Feedburner email subscription widget can increase your blog traffic hugely. Email subscribe widget is most important part of every blogger. Do you know what is email subscribe widget? Yes! this is collect huge amount traffic for your blog. Today i am share 2 beautiful blogger email subscription widget for your blog. Its the awesome and cute email newsletter subscribe box widget for blogger that created with pure css with fontawesome icons. By using this email newsletter forms you can also use your social media links like Facebook, twitter, linkedin, google plus, pinterest, vine and instagram social icons. Attractive subscription widget box is better for every blog. Our first widget is more attractive for blogger.


Popup Facebook Like Box Widget for Blogger

Flat Popup Facebook Like Box for Blogger

Pop up facebook like box is most trending widget nowadays. Popup facebook like box widget for blogger may increase your blog traffic. Targeted visitors are most important of any blog. Retention blog visitors more and more important. If you want to increase your facebook like then should promote your page in your blog with your blog's users. Then you will get more like from your users who visit your blog. Adding the pop up like box is most essential for get more like. So today i am gonna to share a tutorial about pop up facebook like box for blogger.


Nicer Social icons Widget for blogger

Blogger social icons with hover effect

Social icons are most important part of any blog now-a-days. We see any where any website and any apps, they promote their social media links with attractive social icons. In this tutorial, we take a look of creating a beautiful and simple social icons widget with hover effect for Blogspot Blogger. I already named this widget: Nicer Social Icons Widget with hover effect for Blogger.


Blogger Author Bio box in every posts

Blogger Author Bio box with Social icons


Some people want to show their author bio in every post's below. This widget is specially for his/her. Install this author bio box with social icons for blogger. Blogger Author Bio box with Social icons - in this tutorial i am share how to add an author bio box in blogger with social icons. By using this author box you should easily add author's avatar, author's bio (Description) and author's social media links.  For request of some friends today i share this tutorial how to install blogger author box.


Social Media Icons Widget for Blogger

css social media icons widget for blogger

I can hardly say, social media is a important part of blogger SEO. To promote your social media, you have must install attractive and beautiful social media icons widget in blogger. This tutorial help you adding a free social media icons in blogger. The best social media buttons for blogger i shared in this blogger tutorial. Some friends requested me that, how to add social media icons widget in blogger. That's why today i am came with 3 awesome style and fontawesome social network icons widget for blogspot blogger. By using these social media icons widget you may increase your blog's look. If you looking for a social media widget for blogger , then this tutorial for you. Social icons and social media icons is play an important role on every blog. It help you to make connection with your visitors. 


Weather Widget For Blogger

Free Weather widget for website

Hello my dear friends, hope all are fine. Today i am going to show a awesome widget for blogger and that is weather widget. You can easily add a weather widget to your blog using html code. By using this html code you can Create a Current Weather Widget easily. This widget from accuweather.com. You know, accuweather always give better information about weather world wide. That's why we add a weather widget to our blog or website using accuweather. Ok, let's stat.


Breaking News Ticker For Blogger

Add Breaking News Ticker For Blogger

Breaking News Ticker widget for blogger - is a most important and popular tool for blogger. Specially News base blog's must have a breaking news ticker on their website. Today i am share the exclusive tropic. Adding this widget, you can easily shown your latest or recent posts one by one. This widget is help you to show recent posts as a ticker. In this tutorial i will show you, how to add automated breaking news ticker for blogger. Every wordpressian can add latest posts ticker by adding some wordpress plugins easily. But every blogger users need to do it by adding some code manually. In this post, i shared a beautiful breaking news ticker for blogspot blog.


Recent Comments Widget with avatar

Blogger Recent Comments Widget with Cirle Thumbnails - is a widget that can show recent comments. We add many widget for make our blog beautiful. All of them Recent Comments Widget is one. By this widget you can display a number of comment(s). In this time i share this widget. This widget is made with CSS and Javascript. By using this widget you also change the comment avatar size (Default size is 45px). This recent comment widget is fully different with other widget. This CSS look is awesome. Now let's start.


Animated Social Share Button For Blogger

Blogger Animated Social Share Button

Animated Social Share Button For Blogger with CSS - is a share button that is make your blog more attractive. If you search for share button on internet, then you found many results like AdthisShare ThisSimple Share buttonAddtoany etc share button for blogger. Those are mostly helpful and workable. Today i am share an awesome animated mouse hover social share button for blogger. This share button is fully customized with CSS. Using this share button you should add FacebookTwitterGoogle+Linkedin and Pinterest share button on blogger blog.


Blogger Author Widget with social icons

Blogger Author Widget with CSS3


Blogger Author Widget with CSS3 - in this tutorial i shared a author widget for blogger. Yeah! its a great tutorial for all bloggers admin. Specially this tutorial my helpful for who run personal blog. A beautiful widget is only for you. Flat, Clean and responsive. You should add 4 social icons with your links. Twitter, Facebook, Dribble and Google Plus icons. This widget will work with CSS3 transition hover effect. When you mouse hover on this widget, then it open other part. Its social icons part. If you wanna see a demo, look at our first widget.


Pop up Email Subscribe box for Blogger

blogger pop up email subscribe box

Popup email subscription or newsletter widget for blogger another essential widget. Using popup email subscribe box you can hugely increase your feed subscribers. Pop up Email Subscribe box for Blogger - is a blogger widget using jquery. This subscription form created with css3 and jquery. In this tutorial i shared how to add pop up email subscription box for your blogspot blog. By adding this widget, you should easily increase your blog readers. It's a better way for increase blog readers. I hope this fresh pop up email subscribe box help you to increase blog readers. Now lets start the tutorial.


Facebook comment box for Blogger

blogspot new facebook comment box

Facebook comment box is another popular comment system in blogger. Latest version Facebook comment box for Blogger - The Comments plugin lets people comment on blog post on your site using their Facebook account. If people wish to they can share this activity to their friends in News Feed as well. This comment box also contains built-in moderation tools and special social relevance ranking. There have been many facebook comment box in internet but today i am share the latest version of facebook comment box. Recently facebook developer update their Facebook Comment box plugin version v2.3. The main facilities are using of facebook comment box is, visitors are easily explain their opinion about your content and admin can catch his/her visitors easily.


We'll continuously add most popular and attractive blogger widgets in this posts. Subscribe Now for all latest blogger widgets and free blogger templates. If you have any request or any question about blogger widgets, then feel free to discuss in comment section. I will try to my label best to solve you problems. You can also directly contact with me on Facebook

I hope that all blogger widgets are may helpful for you. If you found any problems on any widgets, then inform me on comment sections. I will assist you my label best. And finally you if you thinks our posts are helpful, then do not forget to share our articles with others. Thanks...

Thứ Ba, 17 tháng 5, 2016

Install Custom Stats Widget for Blogger

total page views counter widget for blogger

In this post, i am going to share with you custom stats blogger widget. By using this widget you can display total page views, total posts and total comments of your blog. Only blogger has total page views widget. After that time, i modify some css and added some script for total posts and total comments. The design of this widget is modern and clean. I used some icons using font awesome. Installing custom stats widget is very useful blogger widgets. In my own template i am also using a custom stats widget. But this is only total page views and total posts. 

It is very unique and smart design. Some of friends requested me to share this blogger widgets. After that time now i am share this with new look and one more extra features. This blogger widgets help you to display Total page views, comments and total posts of your blog. People who want make their blog more attractive and beautiful, some blogger widgets make them easy.


How to install custom stats blogger widget

Here is some very simple steps to installing custom stats blogger widget. In this blogger widget i used font awesome icons and PT Sans google font. So you have also need to adding These fonts on your blog. If font awesome already added on your blog. then ignore it.

Step 1: Go to Layout > Add a Gadget > Blog's Stats add this widget.

Install Custom Stats Widget for Blogger

Step 2: Now go to Edit HTML and find below codes.
   <b:widget id='Stats1' locked='false' title='Custom Stats' type='Stats' version='1' visible='true'>...</b:widget> 

Now replace this line with below codes.

   <b:widget id='Stats1' locked='false' title='Custom Stats' type='Stats' version='1' visible='true'>
<b:includable id='main'>
<b:if cond='data:title'><h2><data:title/></h2></b:if>
<div class='widget-content'>
<!-- Content is going to be visible when data will be fetched from server. -->
<div expr:id='data:widget.instanceId + &quot;_content&quot;' style='display: none;'>
<!-- Counter and image will be injected later via AJAX call. -->
<b:if cond='data:showSparkline'>
<img alt='Sparkline' expr:id='data:widget.instanceId + &quot;_sparkline&quot;' height='30' src='http://2.bp.blogspot.com/-nsxCtkYnchQ/VLEifAyf97I/AAAAAAAAIlk/9Viyy0W9r04/s1600/FFF.png' title='Sparkline' width='75'/>
</b:if>
<b:if cond='data:showGraphicalCounter'>
<span class='counter-wrapper graph-counter-wrapper' expr:id='data:widget.instanceId + &quot;_totalCount&quot;'/>
<b:else/>
<span class='counter-wrapper text-counter-wrapper' expr:id='data:widget.instanceId + &quot;_totalCount&quot;'/>
</b:if>
<script type='text/javascript'>
function postCount(json){
document.write(&quot;<span class='counts post2'> Total Posts &quot;);
var count = json.feed.openSearch$totalResults.$t;
document.write(&quot;<span class='count'>&quot; + count + &quot;</span>&quot;);
document.write(&quot;</span>&quot;)
}

function numberOfComments(json){
document.write(&quot;<span class='counts comment'> Total Comments &quot;);
var count = json.feed.openSearch$totalResults.$t;
document.write(&quot;<span class='count'>&quot; + count + &quot;</span>&quot;);
document.write(&quot;</span>&quot;)
}

</script>
<script src='/feeds/posts/default?alt=json-in-script&amp;amp;max-results=0&amp;amp;callback=postCount' type='text/javascript'/>
<script src='/feeds/comments/default?alt=json-in-script&amp;amp;max-results=0&amp;amp;callback=numberOfComments'/>


</div>
</div>
</b:includable>
</b:widget>

You're 80% done. Now paste all below CSS Codes befor </head>
 <link href='//fonts.googleapis.com/css?family=PT+Sans:400,700' rel='stylesheet' type='text/css'/>
<link href='//maxcdn.bootstrapcdn.com/font-awesome/4.5.0/css/font-awesome.min.css' rel='stylesheet'/>
<style type='text/css'>
/* Blogger Custom Stats widget by msdesignbd.com */
.Stats img {display:none!important;background-image:none;}
.Stats .counter-wrapper {width:92%;text-align:right;margin:10px;line-height:35px;color:#333;font-weight:700;font-size:16px;margin-left: 0;}
.Stats .counter-wrapper:after {content:&quot;Page Views&quot;;float:left;text-align:left;font-size:13px;font-weight:700;color:#333;}
.counts {display:inline-block;width:92%;font-size:13px;line-height:35px;color:#333;font-weight:700;}
.counts .count {display:inline-block;font-size:16px;height:30px;
vertical-align:top;direction:ltr;float:right;color:#333;font-weight:700!important;}
.counts:hover .titles:before {color:#333!important;border-radius:2px;border-color:rgba(255,255,255,0.1);}
.counter-wrapper.text-counter-wrapper:before, .counts:before {display:inline-block;font-size:13px;font-family:FontAwesome;font-style:normal;font-weight:normal;margin:0 10px 0 10px;float:left;width:10px;text-align:center;}
.counter-wrapper.text-counter-wrapper:before, .counts:before {
display:block;background-color:#fff;color:#333;width:35px;height:35px;font-size:18px;line-height:35px;border-radius:2px;margin:0px 8px 0 0;}
.counter-wrapper.text-counter-wrapper:before {content:&quot;\f06e&quot;;}
.counts.post2:before {content:&quot;\f044&quot;;}
.counts.comment:before {content:&quot;\f0e6&quot;;}
#Stats1_content {width:auto;height:auto;background-color:#fff;}
</style>

You're done. Now Save template and see result by refreshing page.

Hope you understand that, how to add custom stats blogger widgets on blog or blogger site. If you have any problem, then feel free to communicate by comment box. If you like this widget, then don't forget to share this post with your social media. Your support is our future. Thanks.  

Thứ Hai, 16 tháng 5, 2016

Sidebar Floating Facebook Like Box For Blogger

Sidebar Floating Facebook Like Box For Blogger

Sidebar Floating Facebook Like Box For Blogger - is a widget for adding a like box on blogger in sidebar. Facebook like box for website or blogspot is a important widget to increase fan page like. You can easily grow up your facebook fan page like using facebook like box. Today i am share awesome and beautiful facebook like box for website. This a sidebar floating facebook like box. When visitors mouse hover in facebook icon, then it Floating and open a like box from sidebar. This script i founded around internet. But i customize this script with CSS and get up an awesome look. You can add this code also any wordpress blog.

Also Read: Flat Popup Facebook Like Box Widget for Blogger

Facebook like box widget pay an important role on every blog. We know, facebook is the largest social networks. You may get a huge number of traffic form facebook if you have a big number of fan. Facebook like box for blogger is the easiest way to promote your fan page with your visitors.

Floating Facebook Box for Blogs

In this tutorial i will show you, how to add facebook like box to blogger. Every one looking for different and attractive widget for his/her blog. You may find different type of facebook like box widget for blogger. example: Popup facebook like box ( if you interested to add popup facebook like box to blogger then check out this widget: Flat Popup Facebook Like Box Widget for Blogger ). From my opinion sidebar floating facebook like box for blogger is the best widget.

MS Design BD always published different and attractive blogger widgets for blogspot. We always share customized attractive and beautiful blogger widgets for blogspot blogger. So, floating facebook like is also a different type of blogger widget. This widget is totally customized facebook like box with css.


Sidebar Floating Facebook Like box for Blogspot

To add this beautiful facebook like box for blogger, at first your have to need add jQuery in your blog (if already added, then ignore it). Now go to Blogger Dashboard > Template > Edit HTML find and past below code before </head>
 <script src='//code.jquery.com/jquery-1.10.2.min.js' type='text/javascript'/> 

Now Save Template

Below steps are adding floating facebook like for website or your blogspot blog. Add below codes on widget.

Step1: Go to your blogger dashboard Layout > Add a Gadget and find HTML/Javascipt
Step2: Copy the below codes and past on HTML/Javascipt
 <script type="text/javascript"> 
//<!--
$(document).ready(function() {$(".msfslikebox").hover(function() {$(this).stop().animate({right: "0"}, "medium");}, function() {$(this).stop().animate({right: "-250"}, "medium");}, 500);});
//-->
</script>
<style type="text/css">
.msfslikebox{background: url("http://i.imgur.com/pQGrWuH.png") no-repeat scroll left center transparent !important;display: block;float: right;height: 270px;padding: 0 5px 0 46px;width: 245px;z-index: 99999;position:fixed;right:-250px;top:20%;}
.msfslikebox div{border:none;position:relative;display:block;}
.msfslikebox span{bottom: 12px;font: 8px "lucida grande",tahoma,verdana,arial,sans-serif;position: absolute;right: 6px;text-align: right;z-index: 99999;}
.msfslikebox span a{color: #808080;text-decoration:none;}
.msfslikebox span a:hover{text-decoration:underline;}
</style><div class="msfslikebox"><div>
<iframe src="http://www.facebook.com/plugins/likebox.php?href=http%3A%2F%2Ffacebook.com%2Fmsdesign.rtml&amp;width=245&amp;colorscheme=light&amp;show_faces=true&amp; connections=9&amp;stream=false&amp;header=false&amp;height=270" scrolling="no" frameborder="0" style="border:4px solid rgb(53, 102, 203); overflow: hidden; height: 266px; width: 240px;background:#fff;"></iframe></div></div>


Note: msdesign.rtml change it with your facebook page user name.

After adding above codes, if this widget does not work, then make your that did you have in your template fb-root. If not, then add fbAsyncInit right after <body> from below.
 <div id='fb-root'/>
<script type='text/javascript'>
//<![CDATA[
window.fbAsyncInit = function() {
FB.init({
appId : '878599892159456', // replace with your app id
status : true, // check login status
cookie : true, // enable cookies
xfbml : true // parse XFBML
});
};
(function() {
var e = document.createElement('script');
e.src = document.location.protocol + '//connect.facebook.net/en_US/all.js';
e.async = true;
document.getElementById('fb-root').appendChild(e);
}());
//]]>
</script>
Save Template and now see result.

If you found any problem then obviously inform me on comment section. Happy blogging and keep sharing my posts. Thanks...

Thứ Ba, 15 tháng 3, 2016

How to add Disqus Comment System on Blogger

Easily Install Disqus comment system on Blogger

Hello guys! After long time i am sharing a blogger tutorial with you. I think you're familiar with Disqus comment! Yes guys, Disqus is one of the best popular commenting system nowadays. In this tutorial i will show you how to add disqus comment on blogger. It may bring another beauty of your blog. Disqus give you various features and these are free. Some friends requested me for this tutorial. In this article, step by step i detailed about Blogger Disqus comment. It has great design and spam filter. I think it is the best spam protection comment system ever. It is also mobile friendly comment system. You can also read Facebook Comment box for Blogger

Day by day Discus Comment increasing their features. Only they give real-time discussion opportunity. Here is some features of Discuss comment system.

  • Threaded Comments.
  • Real-Time Discussion.
  • Spam Control.
  • Social Sign On.
  • Easily Sing up
  • User Analysis and History.
  • Integrated Moderation.
  • Moderation Dashboard.
  • Word Filtering.
  • Mobile Friendly
  • And more... 

How to Install / Add Disqus Comments on Blogger?

Step 1: At first Sign Up to Diqus. You can also sign up with your Social profile (Facebook, Twitter, Google+) or with your email. After that, it will say you select your Name, your email and your password. After providing Your Name, Email and password then click on Sing up Button. Follow below screenshot. (Don't forget to verify your email)

Blogspot blogger discus comment install tutorial


Step 2: You're almost done. Now go to Setting page Admin section and provide your Blog Name, Choose your unique Disqus URL, then select your blog category. After that go to next page by clicking Next button.

Easily install disqus comment on blogger

Step 3: After that, you will be go to install page. From this page you have to need chose your platform Blogger. You can also add this comment system on Wordpress, Tumblr, Squarespace, TypePade, Movabletype, Dupal and Joomla. Whereas this tutorial about blogger, then we select platform Blogger. 

How to add Disqus Comment System on Blogger


Step 4: After select your platform Blogger, then Install instructions page will be appear. Now add Disqus comment widget on your blog by clicking Add MS Design BD to my Blogger site. Here MS Design BD is my Disqus name. Then it will open a new window with the add a gadget menu. Select the blog that you want to add this comment system and click Add Widget. You’ll be redirected to Bloggers Layout page where you’ll see the new gadget (never remove this widget). Now you'r totally done. Refresh your blog and see the result. 
How to add Disqus Comment System on Blogger

If you have a huge number of comment of your blog, then you can import these comment on Disqus. For import your existing Blogger comments into disqus go here.

If you're using old Blogger Template, then you'll need to make this comment system browser compatible see instructions here.

Sometimes this widget may not work for old template. If the widget does not work, see Blogger Installation Help for instructions on how to update your Blogger template to work with the widget.

That's all guys. Hope you'll be helped by this tutorial. If you found any problem about this disqus comment box for blogger, then feel free to leave a reply. I will try to assist you. Don't forget share this with your social media. Thanks...